


The Best Interactive Sales Presentation Software to Close More Deals

Wondering how to make a video presentation with audio?
You're in the right place.
In this guide, we’ll cover the 8 steps to creating video presentations with voiceovers, pictures and music. We've also included tips for powerful presentations and customizable templates to help you get maximum results.
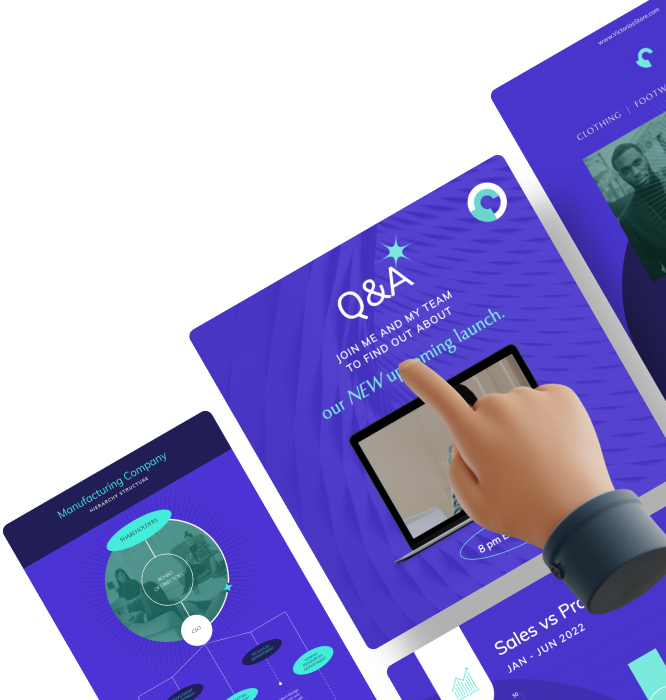
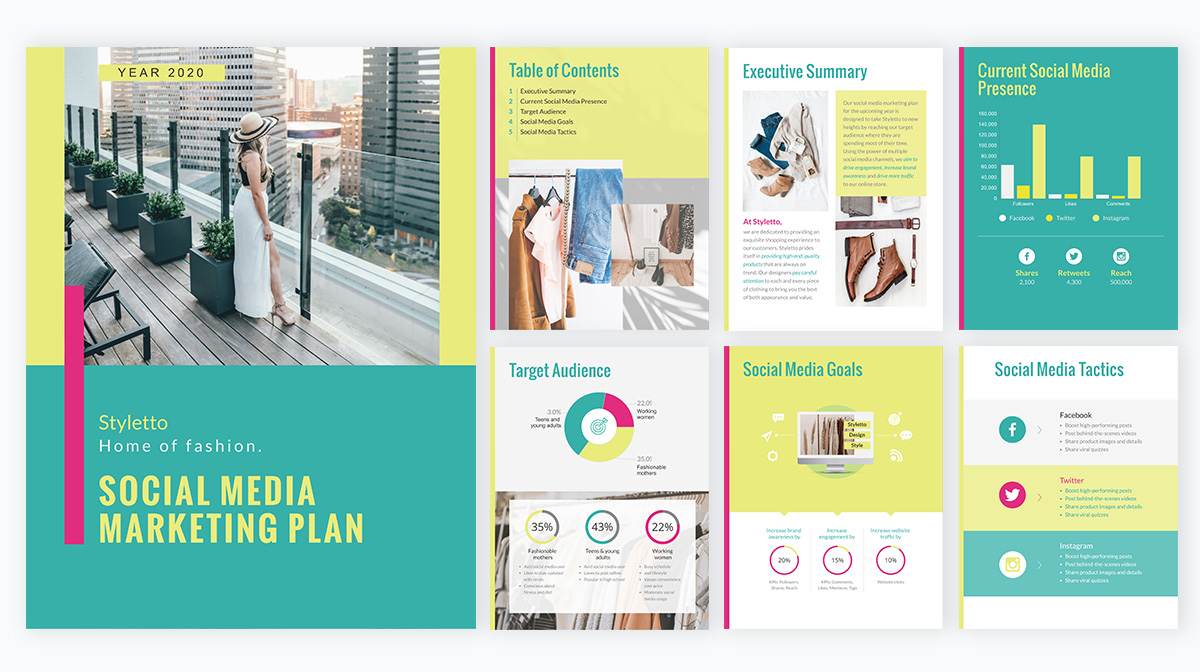
Here’s a short selection of 8 interactive presentation templates you can edit, share and download with Visme. View more templates below:


Jump to your desired section in the table of contents below.
What Makes a Good Video Presentation?
Step #2: Organize Your Content
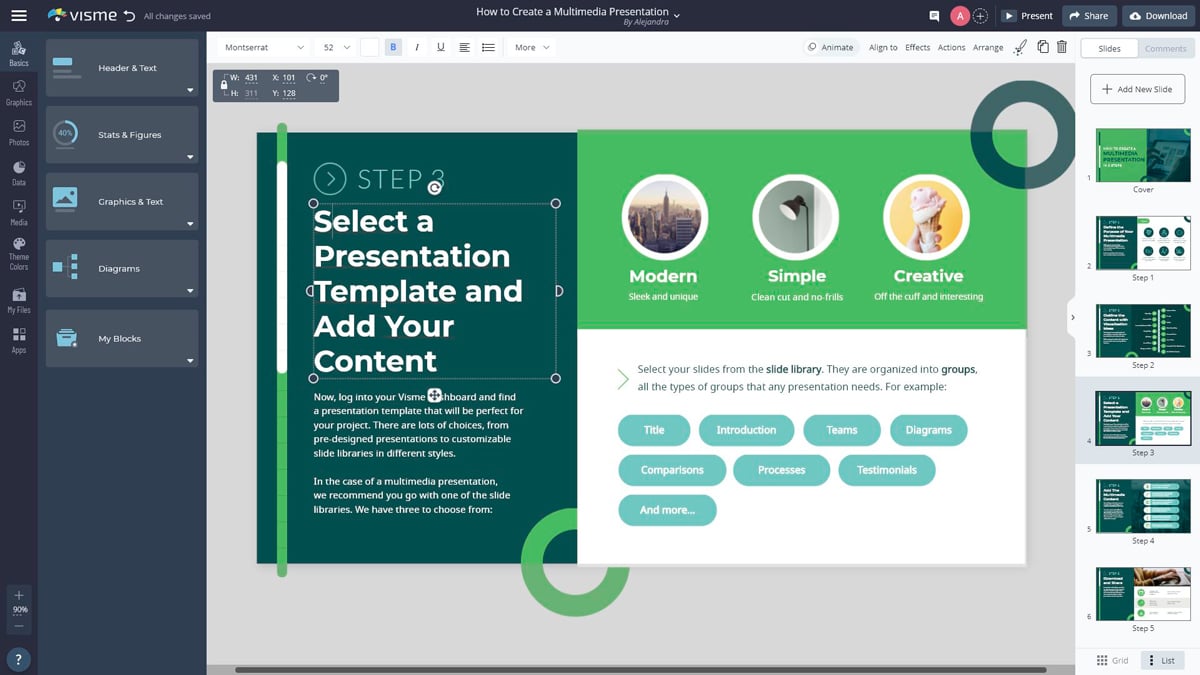
Step #3: Log in to Visme and Choose a Template
Step #4: Input Your Content into the Slides
Step #5: Add Animations and Transitions
Step #6: Add Audio to Your Presentation
A video presentation is a presentation that can be shared and viewed as a video. Technically, for a presentation to be a video presentation, it must be an MP4 or MOV file type.
A video presentation can be shared online on YouTube, Vimeo and other social media platforms. The best part of a video presentation with audio is that you can share it widely without the need of being there to present the information in person.
Even a live presentation can be improved with a video slideshow. Simply give a live introduction during your webinar or summit, and then play your video presentation to the audience.
A video presentation becomes even more valuable and high-quality when you add audio to it. For example, adding a music clip or a narrated voiceover can do wonders to help you get your message across and leave a lasting impact.
Check out this "2021 Year in Review" video presentation we created at Visme.
Made with Visme Presentation Maker
A good video presentation will capture your audience’s attention until the very end.
When it comes to creating a video presentation, there is no definite checklist as to what constitutes a good video presentation. But there are some things you can do to make sure that yours is good enough to keep the viewer engaged.
For example:
Using the tips above, you’re well on your way to creating a video presentation that is sure to make an impact.
Pro-tip: If you have a PowerPoint presentation that you'd like to improve and make unforgettable, simply import it into Visme. You can then start with that base and skip steps 1 to 4. Your imported PowerPoint slides will act as a template of sorts.Ready? Let’s get started with a step-by-step tutorial!
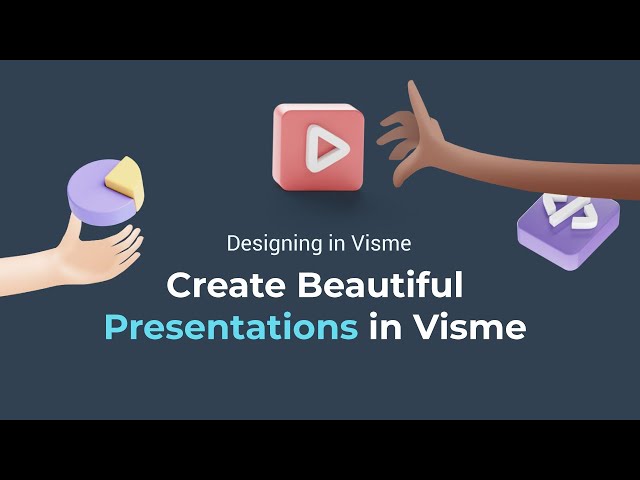
If you prefer watching over reading, here's a short video tutorial on how to create engaging presentations in Visme.
For any successful project to be a success, including your new video presentation, you must plan and strategize. You and your team need to know the purpose of the video presentation before you even start putting together content or visuals.
Why?
Because you need to know the reason, the why, behind the project. That way, the creation process will reflect those goals and take you in the right direction faster.
For example, if you want to create an explainer video about your new product line, do you want the goal to be brand awareness or sales, or both?
If it’s sales, then the messaging and visuals must be created for that purpose. If it’s awareness, then you can take a different approach at how to portray the new product line.
If you want both, then you can do a bit of both and tell a story about the product that explains how it’s made and how it will improve your customers' lives.
Here are the most important questions to ask yourself and your team before you create a video presentation:
Write down a list of goals for your video presentation and make sure they are on-hand during every step of the process. Use these goal-setting worksheets and templates to get started.
Every person involved in the creation of the video needs to know about the purpose, goal and plan at all times — from stakeholders and designers to content creators, marketers and social media managers.
Here's a sample plan template you can use to keep up with your project goals, target audience, tactics and more. Share it with your team to help everyone stay on the same page.
Now that your team is on board and you know the purpose of your video presentation, it’s time to get organized.
This is a step with more value than you can imagine. In fact, it should be an un-skippable step to every visual project you create, along with the first step of planning and strategizing.
Start by organizing all the content for the presentation into a folder on your desktop. Include all the graphics, photos, video clips, audio bites and any brand assets. Create a document with all the written content and make notes on what the audio will be.
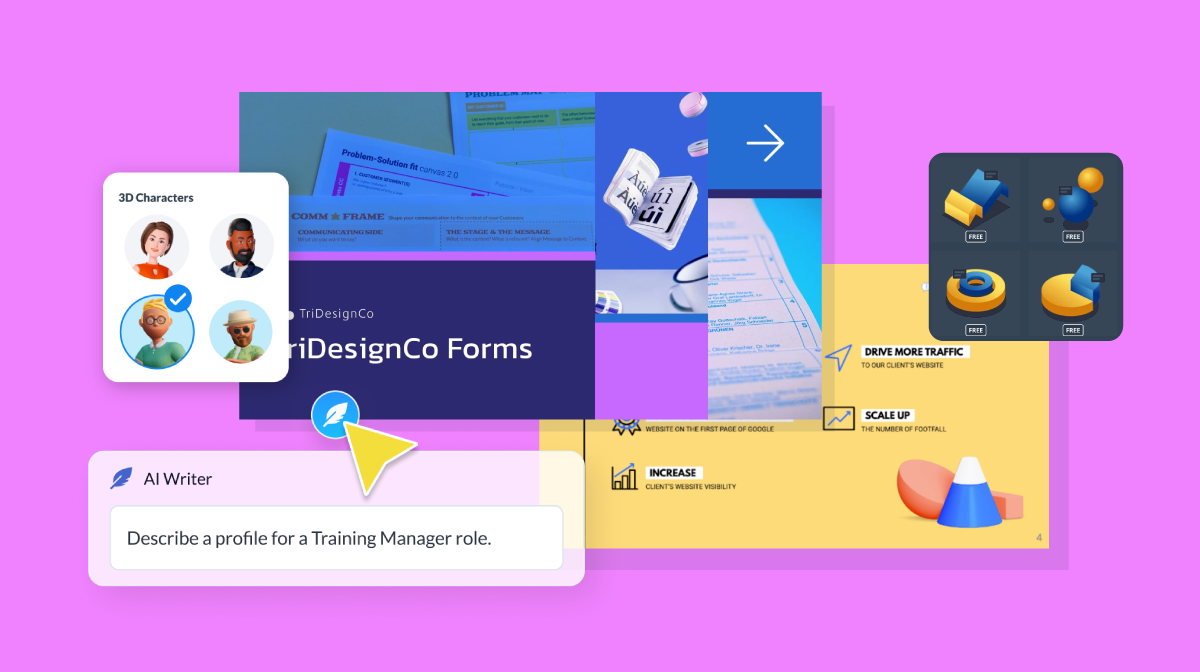
Alternatively, you can work smarter by using some tools featured in this list of the 10 Best AI Voice Generators. Or, use Visme’s AI Writer to craft your script and feed that directly into Visme’s text-to-speech generator to create smooth, natural-sounding voiceovers, without ever picking up a mic.
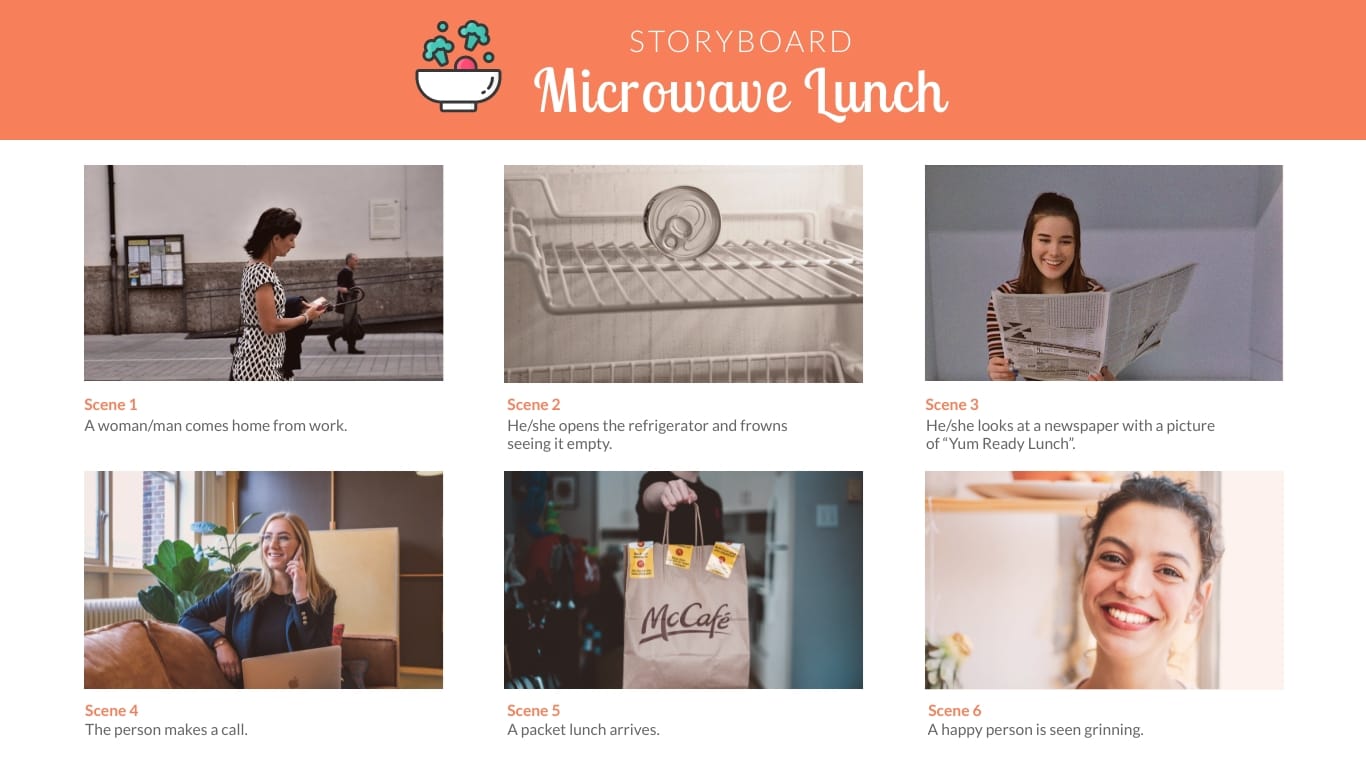
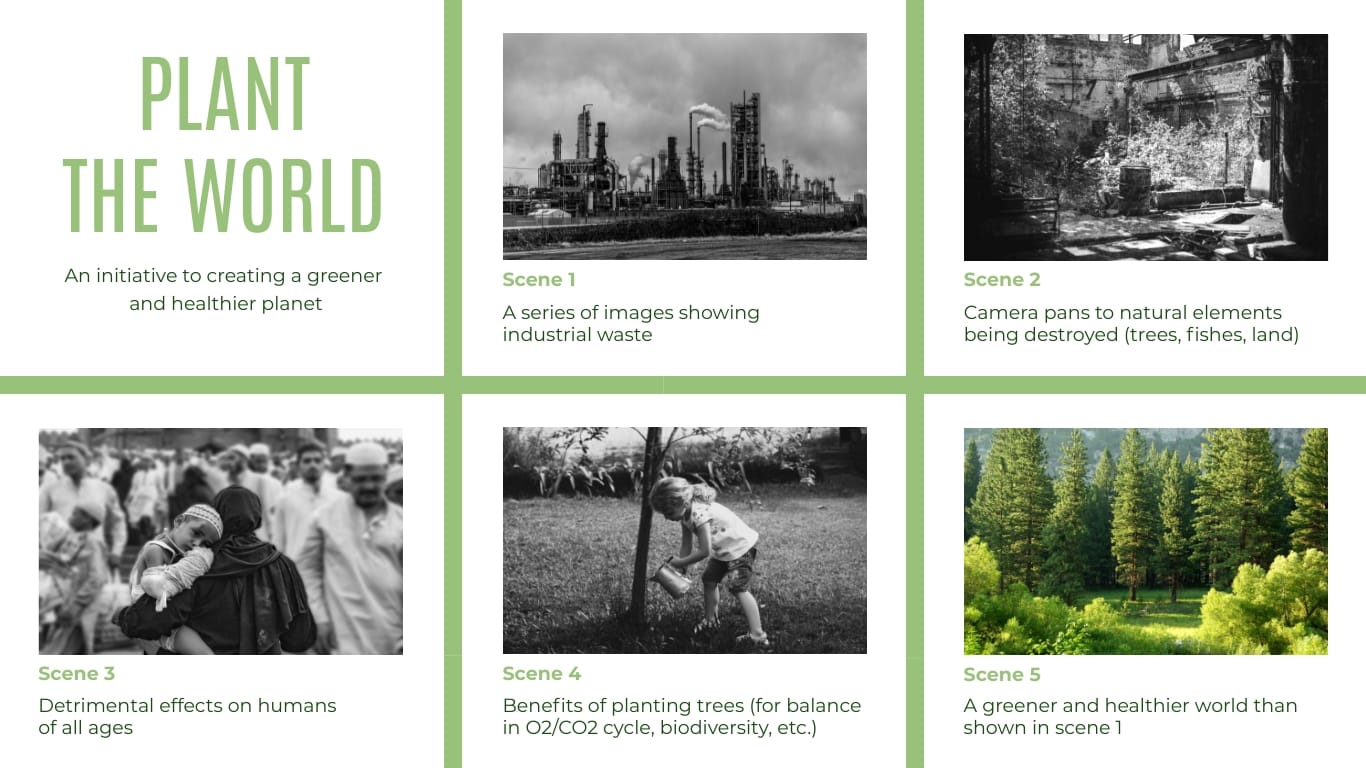
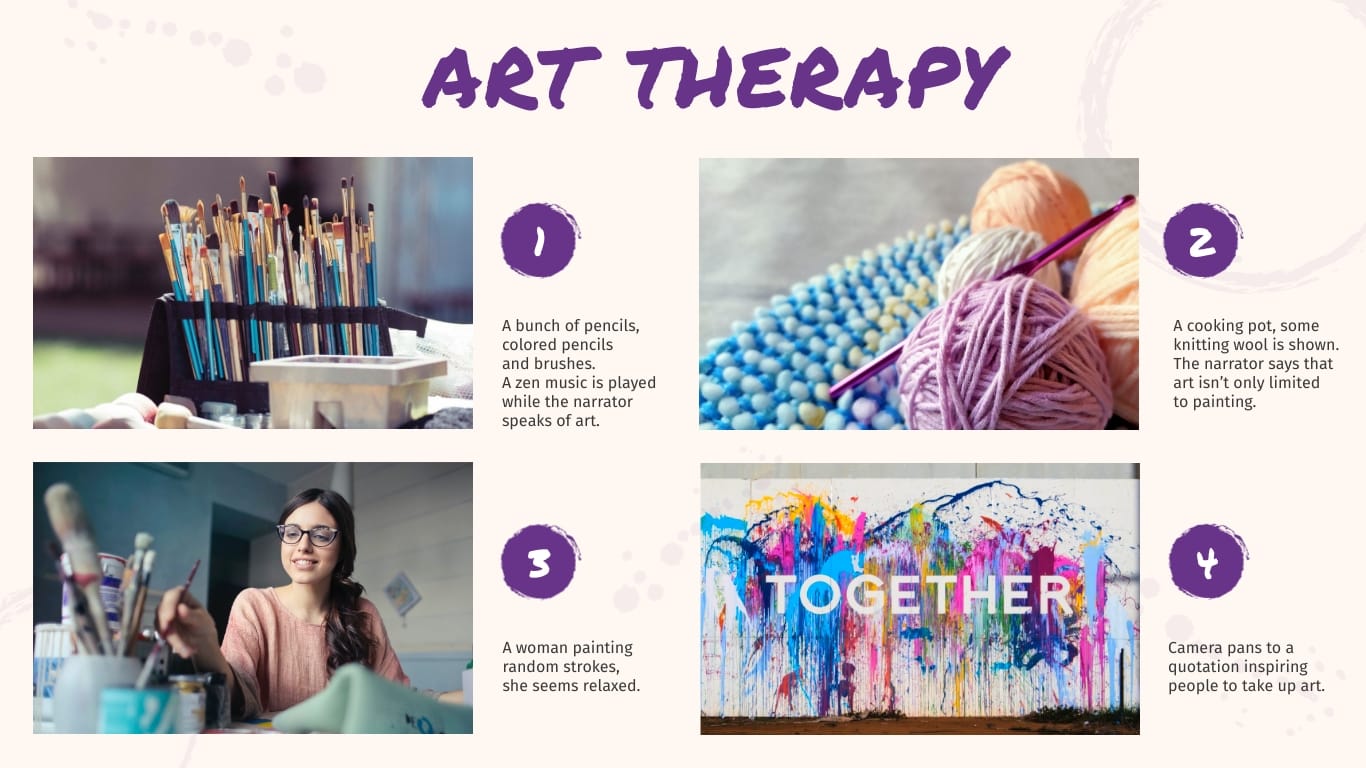
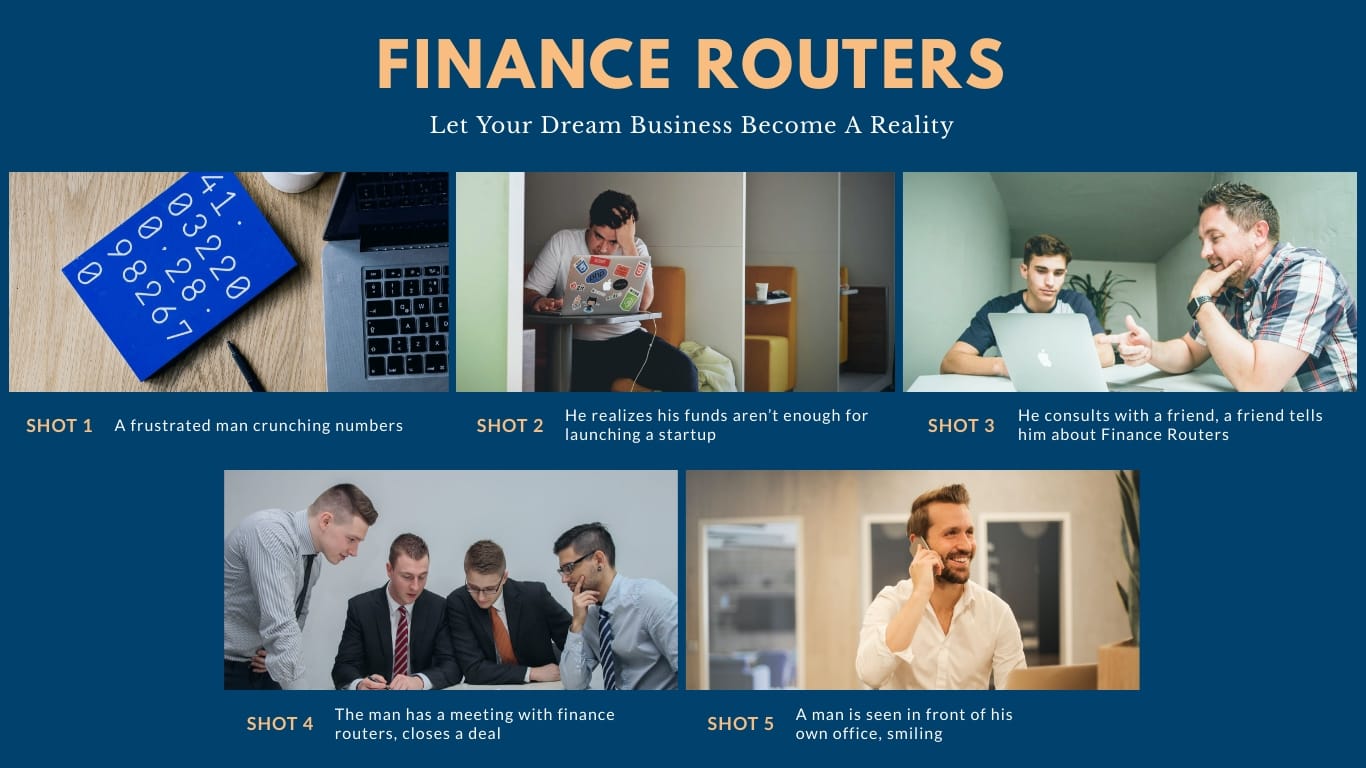
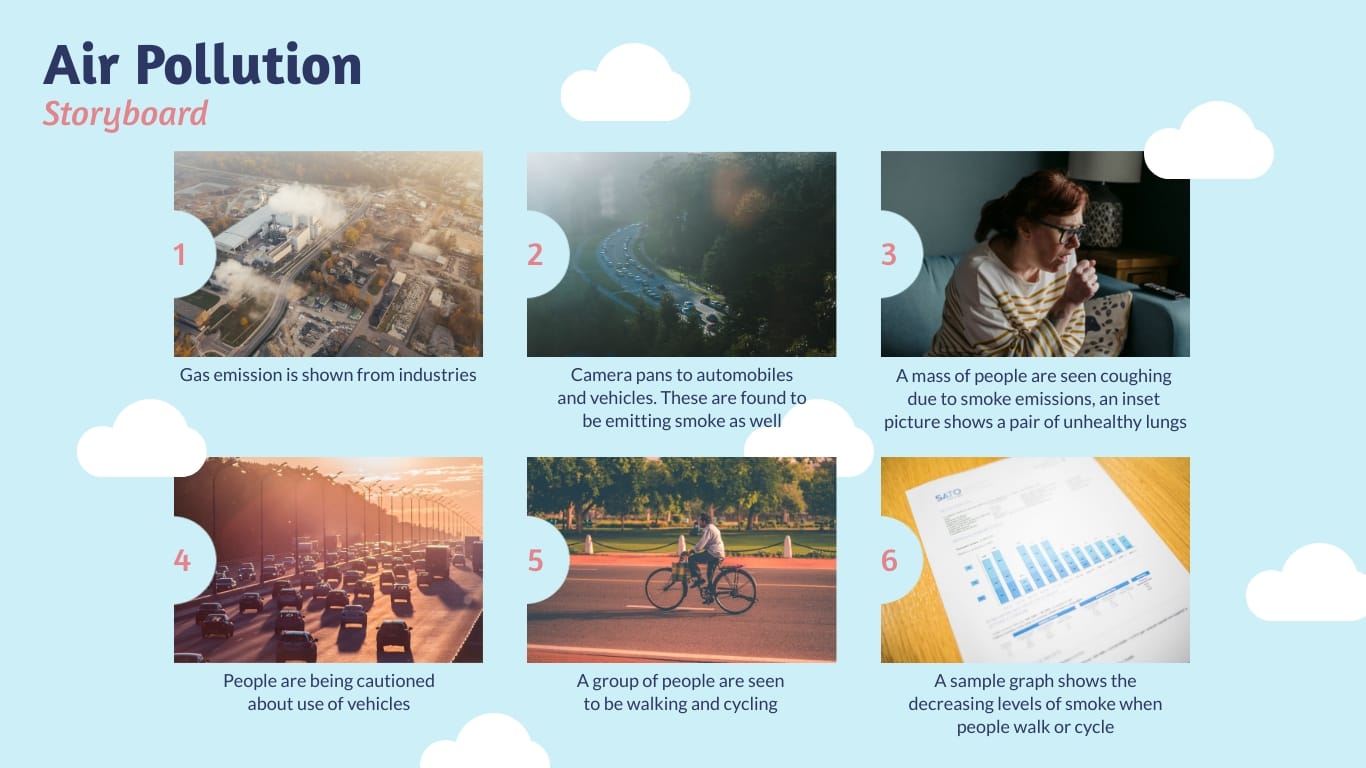
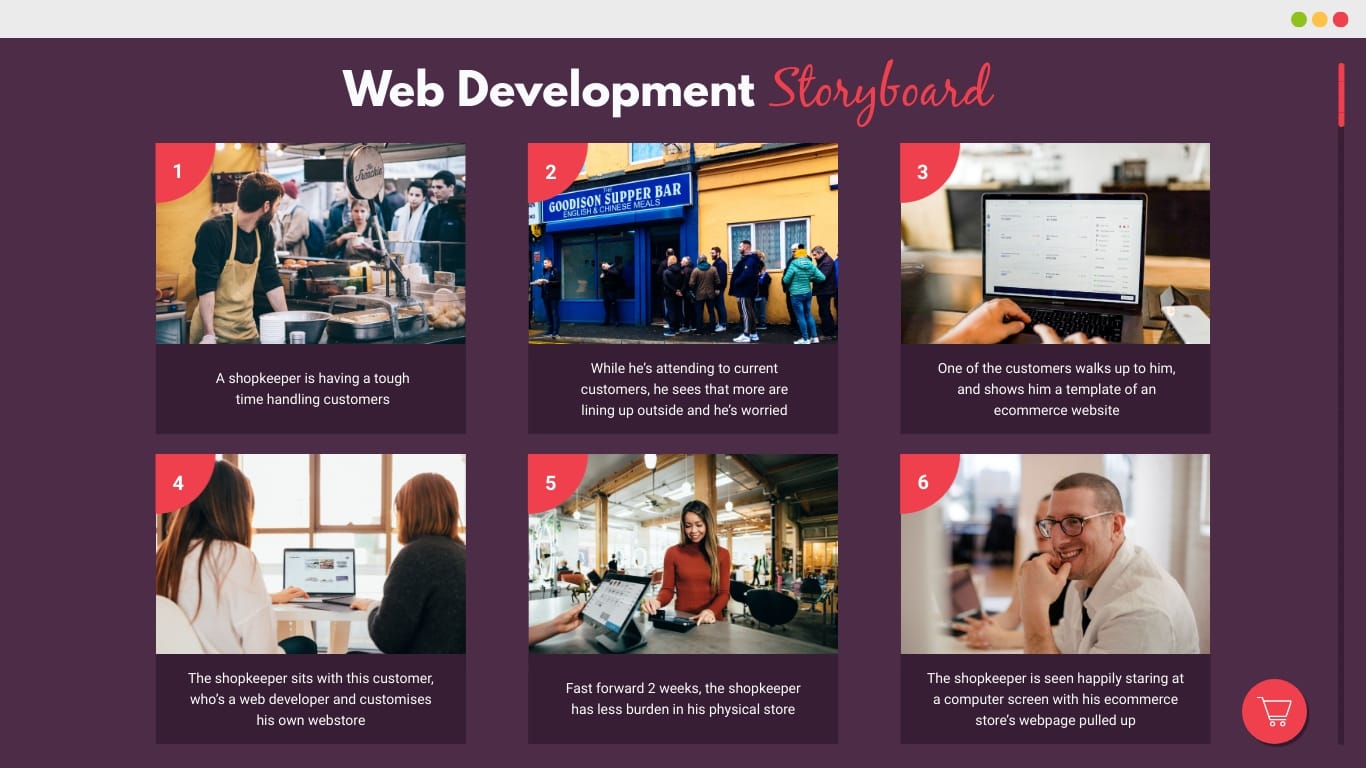
Pro-tip: Visme offers lots of free music tracks inside the editor and an option to record your voice over without leaving your browser.With the written content, draft a simple outline or storyboard. For a video presentation, in particular, you should try a storyboard.
This step is especially important if you have stakeholders invested in seeing the final product and want to see the process.
It's easy! Use one of the Visme storyboard templates to put one together.
Remember, storyboards don’t need to be too detailed. The purpose of making one is to give an idea of what will be created. Don’t invest too much time in trying to perfect it.
Here are some templates to get you started.
It’ll be easier to create a storyboard once you’ve already created the outline. The slide layout for a video presentation is much like the layout of a regular presentation.
For example, here is a broad outline for a regular presentation with sections:
If your presentation doesn’t have defined sections to separate the content in, choose a good flow from one slide to another. For example:
Now that you have a good idea of the purpose of your video, an outline or even a storyboard, it’s time to put it all together.
Log in to your Visme account and select a starting point for your video presentation. This could be:
Use your outline or storyboard to set up your slide order in the editor. Make sure you have all the slides you need to fit your content.
Now, it’s time to add the content to your slides. If you are starting with a blank canvas, you can use content blocks to help you layout the content in balanced compositions.
When adding the content to your slides, remember that people don’t want to read slides on videos. Keep the text to a minimum and use more visuals instead.
If you’ll be using a voice over for the online video presentation, then you’ll need hardly any text on the slides apart from titles and section titles.
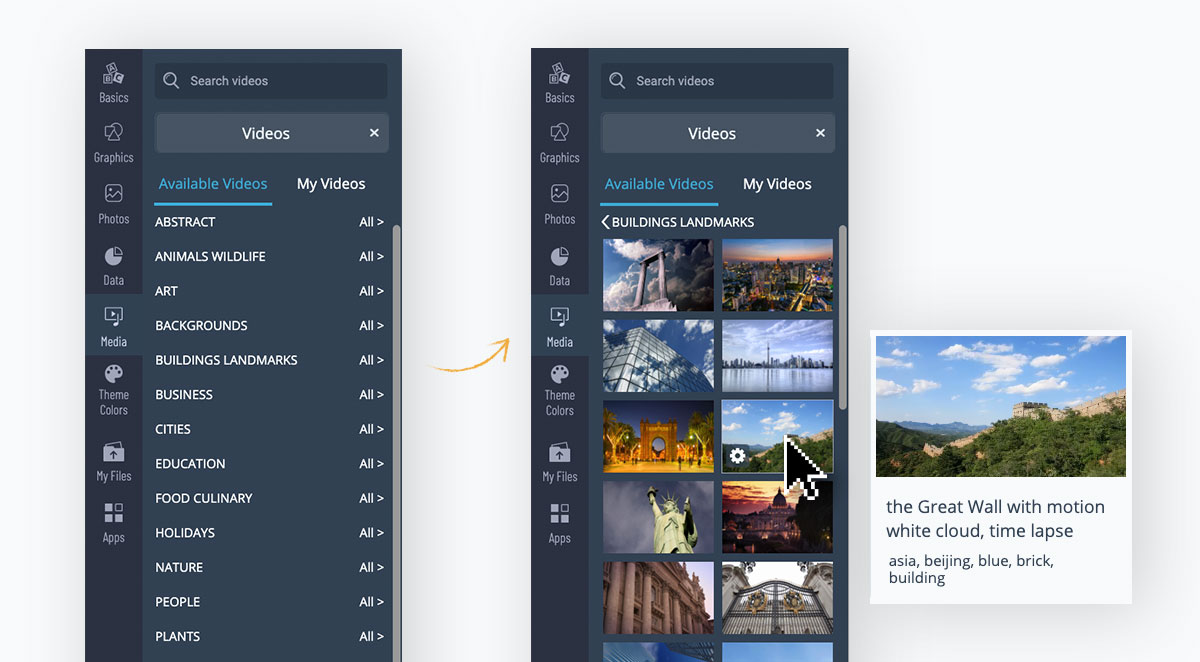
For complementary visuals like images and backgrounds, look through the library on the left side menu of your editor. It’s also likely that you have a selection of images from your company that you want to use in your slides. Upload them to your library.
Add some uniqueness to your images by placing them inside frames or cropping them to fit next to colored shapes and sections.
For backgrounds, you have lots of choices — from full colors to gradients to animated and video backgrounds. Try photographs with filters for a subtle background that doesn’t compete with the foreground elements.
You can also add videos inside your video presentation, either uploaded or with a link to YouTube, Vimeo or Wistia. We suggest you use short videos in this case so that your final project isn’t excessively long.
Do you know how to make a video presentation that is impactful and fun to watch?
Just add animations and moving elements!
Visme comes with built-in with the following animated assets:
It’s time to bring it all to life and go from regular static presentation to video presentation.
At this point, you might already have some animated elements in your slides, maybe some animated icons or animated characters. Before you go ahead and animate anything else, review all the transitions between slides.
It’s important to understand that the animated elements, embedded or background videos, and audio you use must all match the transition between slides.
This is the magic sauce for transforming a normal presentation into a video presentation.
Let’s look at all the animation and transition options in your Visme dashboard and how you can use them to your advantage.

All these elements have options to select the number of repetitions of their action and the speed. The higher number of repetitions you choose, the longer it will take to finish its action. The speed will make the action faster or slower. You can toggle both to find the perfect combination.
The completed action of any of these animated elements will override a timed transition. The transition will wait until the animation is finished to go ahead and start. You can adjust the final length of your animated elements by previewing your slide and taking note of its length.
Additionally, you can customize the poses that the characters portray and also the color of their clothes and skin. These deep customization options will help you stay on brand when creating your video presentations.
Videos you add from the editor or import from your computer have the option to trim to a desired length, loop or autoplay.
Alternatively, use video as a background. Stretch it to fit the entire slide and position it behind all the other content. The edit settings are the same as a regular video.
Visme offers a large selection of quality video clips to use as backgrounds or as complementary visuals. it's also easy to upload your own video to the library.

These loop on their own and are ruled by the transition settings. Animated backgrounds stand out so make sure you are keeping a balance with the elements in the foreground.

Animations can be added to everything on your slide, including the videos and animated icons. You can tweak the settings to control when elements enter and exit the slide.
There are lots of options for these animations and you can time them using the animation settings. Try to keep animations on the same slide to a minimum so they're not distracting.

Transitions can be added slide by slide or to the entire presentation at once. If you don’t go into the transitions menu at all, Visme will apply a staggered enter from the side that already looks great for presentations that you have to click on to continue to the next slide.
For video presentations, you’ll need to edit your transitions to happen automatically according to what is going on in your slide.
In general, you can make the transition happen after a specific number of seconds but if you have an animated element or audio clip that lasts longer, the transition won’t happen until the longest one has finished its action.
For slides with added video, make the transition happen either when the video ends or at a calculated time after the video has ended. Both are available options in the transition settings.
Transitions can be set in different styles, slide from the side top or bottom, or a simple fade or zoom. For a balanced composition, use the same style of transition throughout.
But if you want to get creative, use different transitions to design a more creative flow. Just make sure you don’t go overboard.
In the section above, we already talked a little about how audio works together with the transitions for a seamless video experience.
Now, let’s take a look at how to add audio inside Visme.
As you work on your video presentation, you might feel the need to work on animations, transitions and audio at the same time so that it all fits together in the best way possible.
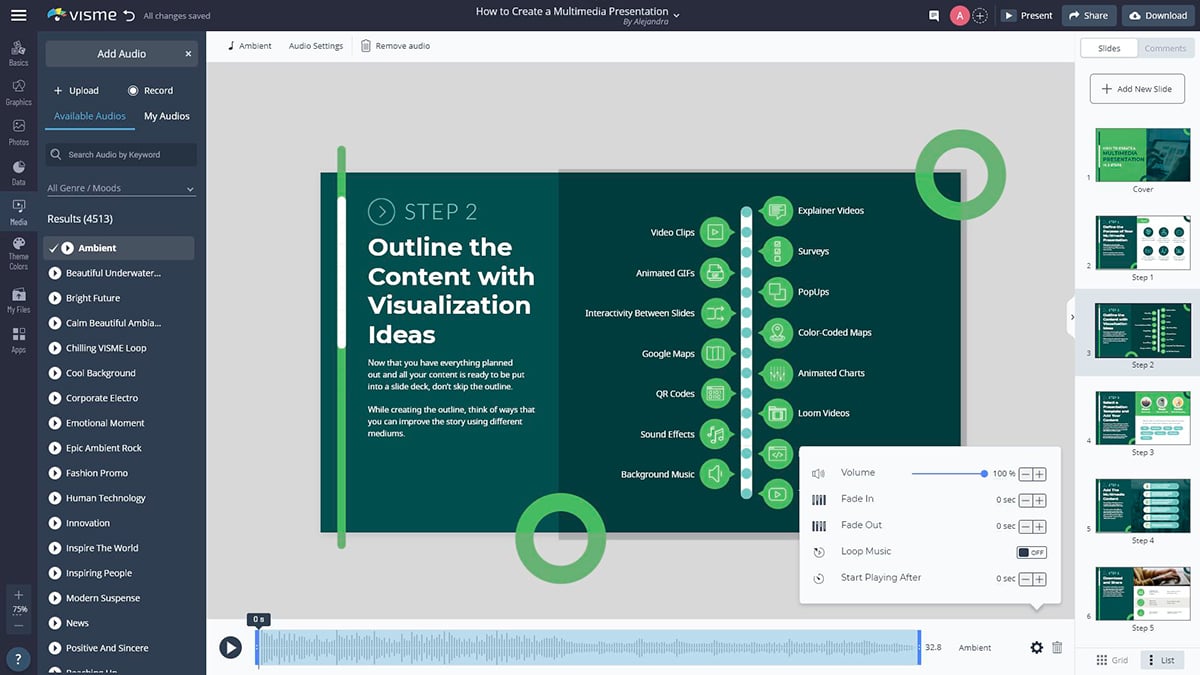
To add audio to your presentation in Visme, you have several options:

To add a background sound clip, click on the top-left hamburger menu and select “Publish Settings”. This is where you can tweak your project's main settings. Click on the third tab "Sound."
Toggle background music on to release a dropdown that shows the options inside the editor or any .mp3 file you’ve added to your library.
Adjust the volume of this clip and choose if it will loop, fade in or fade out. You can also choose if the background audio will play at a specific point in time.
Any background audio will play under all other audio or video you add to the presentation. So make sure these are balanced and make sense together.
Inside the editor, you have the option of adding individual audio clips to each slide.
Choose from any inside the editor or upload your own. You’ll have the option to trim the length of the audio, its volume and if it loops or fades in and out.
Similar to the background audio, you can choose to start at a specific time during that slide’s progression.
When you add a video file that has audio in it, you can choose to keep the audio or turn it off. The option is inside the video settings in the “muted” tab.
You can add voiceovers to your video presentation in three different ways;
Whichever you choose, remember to calculate all the play lengths along with the transitions so that everything flows well.
Now it’s time to review everything and make sure it’s perfect.
First up, do some proofreading of your text to fix any typos or grammatical issues. Make sure all the text is in the correct font and size to stay on brand and maintain a visual hierarchy.
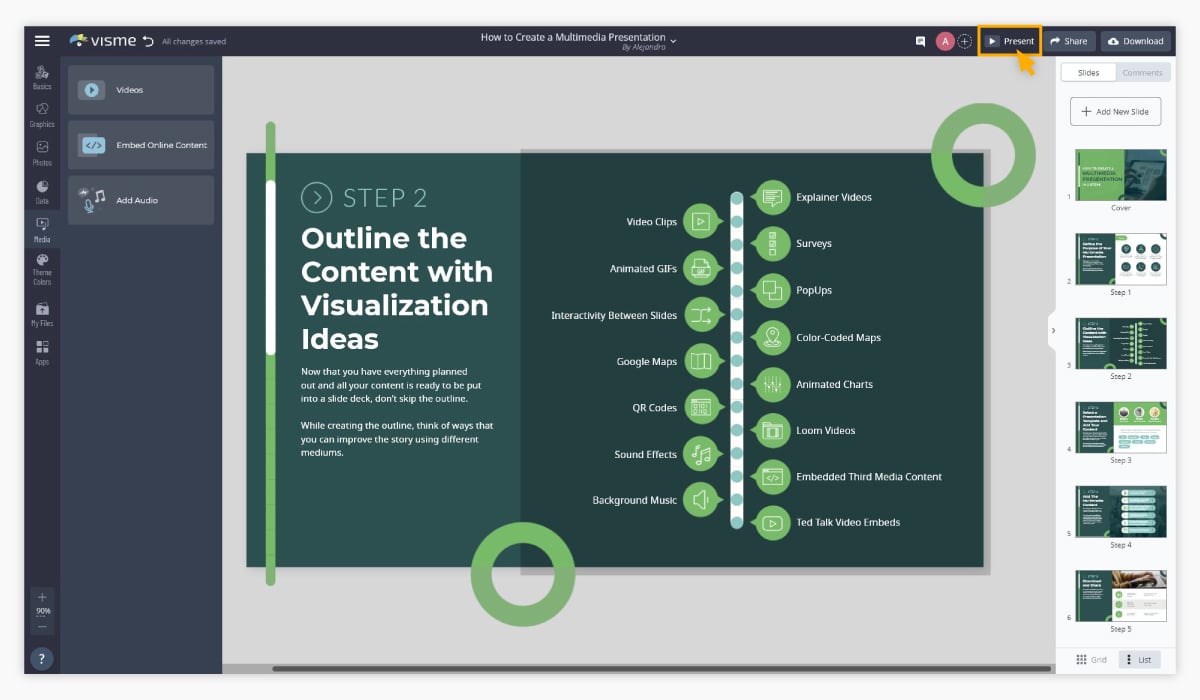
Use the Present button and watch the entire video presentation from start to finish. Take notes along the way of things you notice that need a fix or edit.
If you want to see what the final project will look like to your audience, download a video version and watch it on your video player. Once again, take note of any necessary edits.
You’re done! That was easy, wasn’t it?
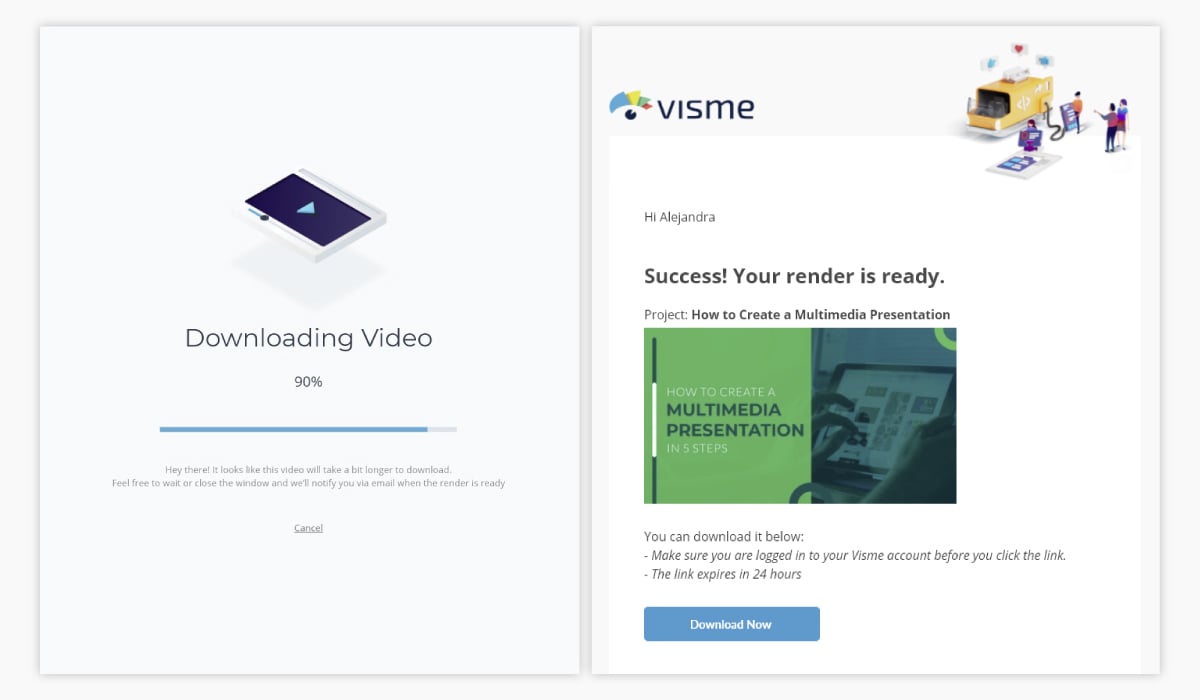
It’s time to share your video presentation with its intended audience. Click on the download button and select the MP4 file option.
If your video is especially long or full of features, it will take a bit longer to download. We’ll send you an email when it’s ready so you don’t have to watch the progress bar.
Go get a coffee or take a break for a job well done!
Once downloaded, upload your video to YouTube, Facebook or any of your favorite social media platforms.
If you created the video as part of a larger Visme project, upload it back into your editor. Use your video as part of an interactive report, or for your website, landing pages or email campaigns.
Are you ready to create your video presentation with audio? Visme offers all you need to create professional-looking video presentations with audio for any purpose and industry.
With plenty of ready-made presentation templates, you don't need video editing experience. And, since Visme is a web-based app, it doesn't matter if you use a Mac or PC computer.
Video presentations with audio are great for projects like:
If you’re still doubting if you know how to make a video presentation, just remember to follow the steps in this guide and use the tips in the first section to guide you through the process.
Don’t forget that the ultimate goal for your video presentation with audio is to leave a powerful, lasting impact on your audience.
Sign up for our presentation software and get started right away. Make simple video presentations or rich, interactive and memorable video presentations with audio, animations, characters, links, embedded content and other exclusive features.
Design visual brand experiences for your business whether you are a seasoned designer or a total novice.
Try Visme for free