Proven Product Specification Examples That Give You Clear Decisions


There’s nothing quite like the high of landing a new client.
You’ve nailed the pitch, won their trust and now they’re officially on board.
Feels great, but this is where the real work begins.
Now’s your chance to turn all that early promise into real value by delivering a seamless, thoughtful onboarding experience that sets the tone for everything to come.
In fact, companies that get onboarding right can boost customer retention by up to 50%.
To make the experience smooth for your clients and manageable for your team, you need a client onboarding checklist that keeps the entire process organized.
A solid checklist ensures nothing slips through the cracks. Better yet, it gives you a repeatable process you can refine and improve over time.
In this guide, I’ll share how to create your own onboarding checklist along with client onboarding templates to get started quickly.
A client onboarding checklist is a step-by-step guide that outlines everything you need to do to successfully welcome and set up a new client. It helps ensure no critical steps are missed during the onboarding process, from signing contracts and gathering key information to setting expectations and aligning on goals.
A solid customer onboarding process gives clients a clear sense of what to expect, while helping you gather the insights needed to align your work to their business.
When done well, it reduces confusion, builds early trust and sets the stage for a productive relationship.
Having a checklist means your team can track progress, stay organized and maintain consistency across all customer onboarding experiences.
Your onboarding checklist will depend on the type of service you’re offering and your client’s needs, but here are a few elements that should include in yours.
Now, let’s take a detailed look at how to create your onboarding checklist.
A warm, welcome message shows your client they’re in good hands and will help build trust from day one.
Keep it short and thoughtful, thanking them for their decision to do business with you. To make the moment even more personal, consider including a welcome video from your CEO or account lead.
I love how Basecamp’s CEO frames this welcome message. It sets a warm, personal tone right from the start.
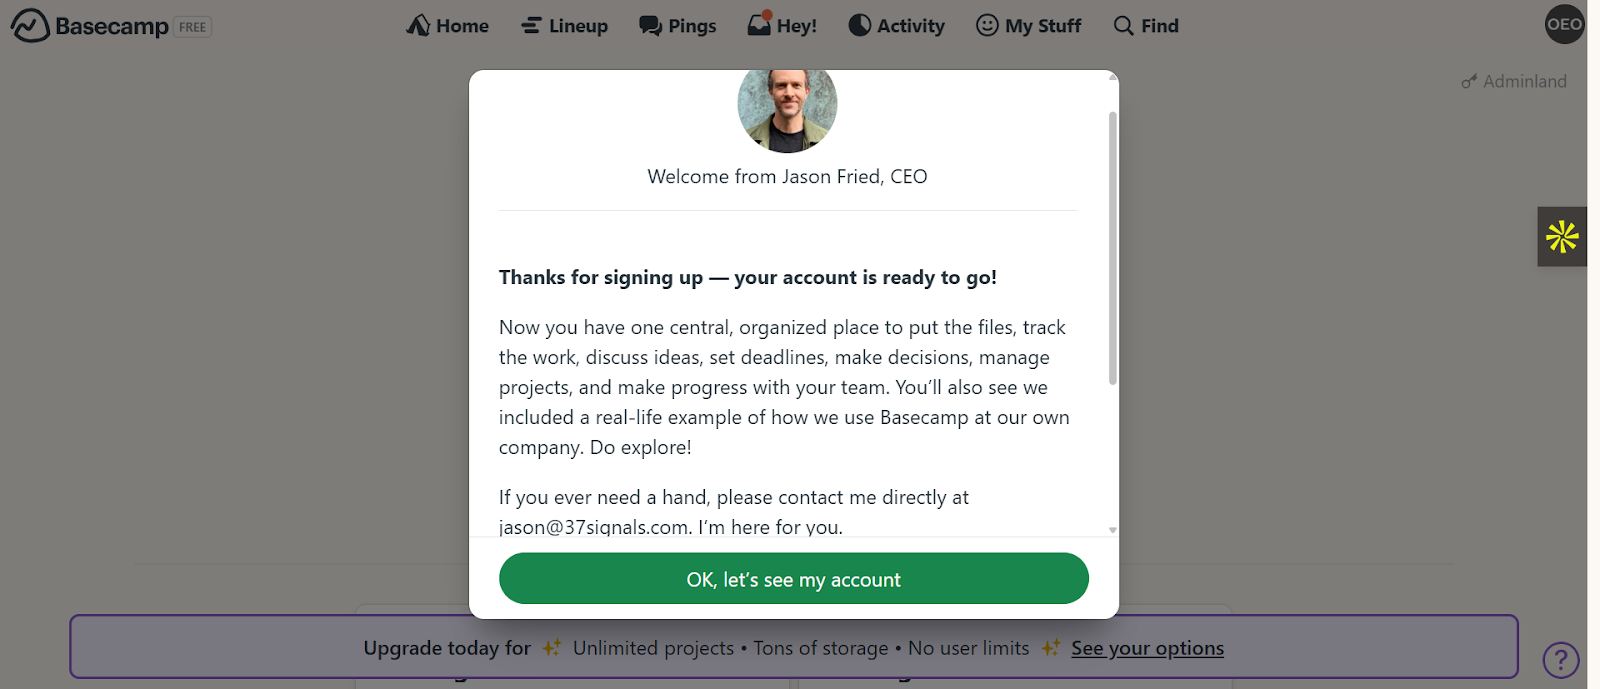
Basecamp’s welcome email also includes links to an onboarding video which is a smart way to showcase the product and guide new users.
Another great touch is the direct link to their resource center’s “Getting Started” section, which makes it easy for users to navigate the interface right away.
Your video could also reference their specific goals or pain points and offer quick wins that are relevant to their context.
For instance, if you’re a brand consultant working with an e-commerce business, you could kick things off by sending a customized onboarding deck that includes:
After the welcome message, your next move should be to set expectations.
Send a follow-up email that introduces key contacts on your team and the dedicated account manager assigned to their account. This person will be their primary point of contact for the entire onboarding process.
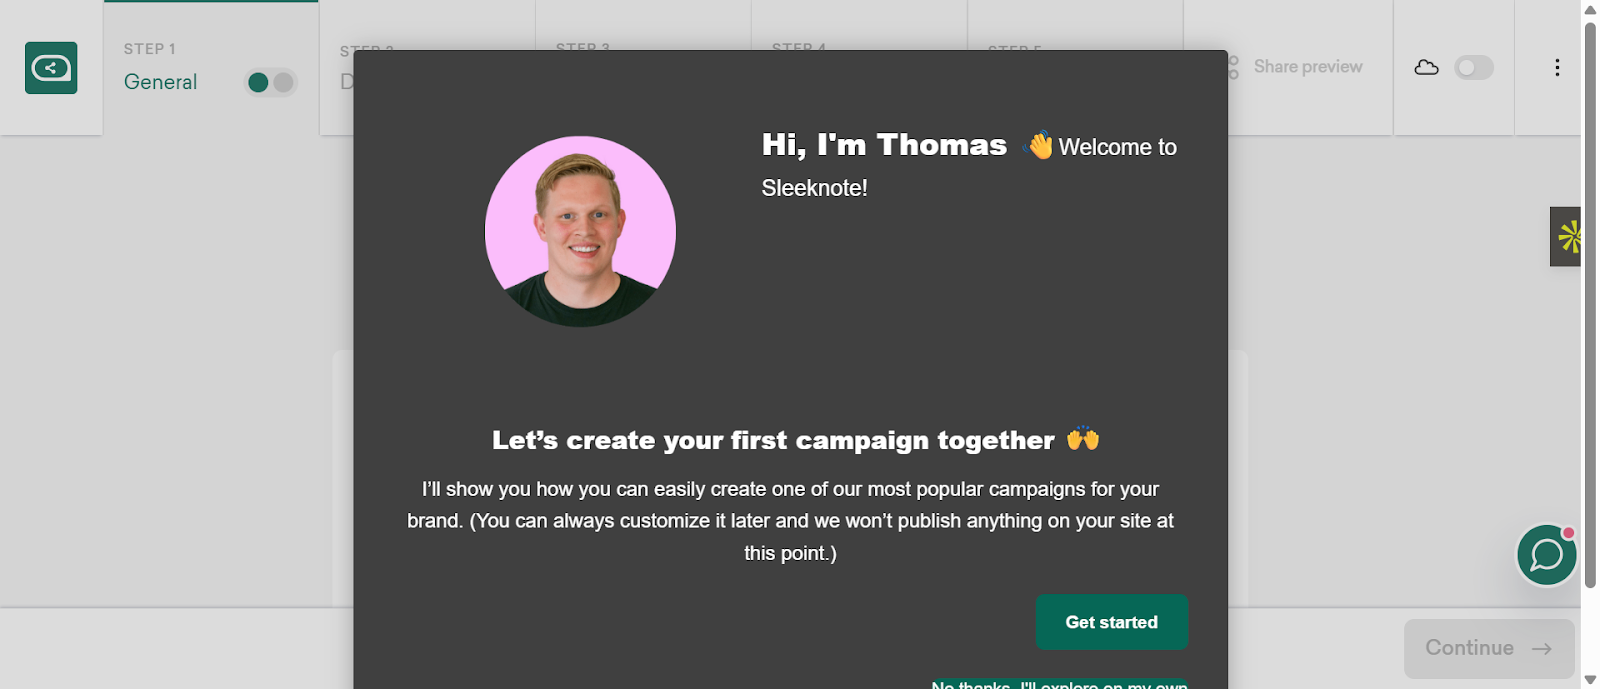
Take a cue from how Sleeknote handles this. Their welcome message has a personalized feel, which will instantly make the client feel supported to start their first campaign.
The follow-up email should also show a clear timeline of what’s coming next in the onboarding process. This acts as a client-facing onboarding checklist, so they can always track the onboarding process.
Before any work begins, locking in the legal and financial groundwork is crucial. A well-structured agreement can prevent costly misunderstandings, reduce scope creep and give your client peace of mind that they’re working with a professional.
Use this phase to clearly define the scope of work, deliverables, timelines, ownership rights and payment terms. Send over the service agreement or contract promptly, share the NDA if required and confirm all billing details. This might include invoicing frequency, payment methods and key finance contacts.
You could also take the time to walk them through the agreement if needed, especially if it includes specific clauses around revisions, intellectual property, or termination terms.
Want to create a new contract agreement form? Use Visme’s contract maker or browse through our library for an easily customizable contract template.
One way to get aligned with a new client is by asking the right questions.
Instead of going back and forth via email or Slack, share an intake form to gather the necessary information upfront.
The content of your questionnaire depends on the nature of the project and the client’s goals. But here are a few thoughtful prompts worth including in your onboarding questionnaire:
To make this step easier, Visme offers a wide range of questionnaire templates to help you out.
Head of Content & SEO at MobiSystems, Adrian Nikolov advised agencies to create role-specific intake forms. According to him:
Pro Tip: Add a link to a calendar invite in your questionnaire so that your client can schedule a kickoff call right after submitting their responses.“One of the most effective onboarding practices I’ve developed is using role-specific intake forms, customized for content, SEO, design, or paid media, depending on the service you're offering. These forms capture all critical details upfront: company policies, product guides, training materials, logins, brand guidelines, tone of voice, technical access and prior performance data. The mistake many agencies make is using a generic form that requires multiple back-and-forth emails to clarify. A targeted intake makes sure your strategist or consultant has exactly what they need, reducing delays and helping teams jump into meaningful work faster.”
Now you’ve broken the ice and laid the groundwork with initial interactions. Next up is the kickoff call, which serves as a formal opportunity to establish roles, workflows and mutual expectations.
These meetings should reinforce what was covered during onboarding and contracting so that both teams are on the same page before the real work begins.
To keep things organized, share a meeting agenda with key action items so everyone comes prepared. You can use Visme’s meeting agenda templates to create one quickly and easily.
Here are some tips on what you should discuss during the kickoff call:
Apart from the above, here’s a crucial point that’s worth discussing during your meeting.
During your kickoff meeting, it’s important to get clarity on what success means to the client. You should ask intentional questions like: “Looking ahead 90 days, what would make you feel confident that this engagement delivered real value?” or “What would a win look like on your side?” These kinds of questions open up deeper conversations about client expectations.
As Sara Cooper, Director of web strategy at Simpro emphasizes:
“Make sure your client defines what success looks like. It’s not just about KPIs and timelines, but understanding what outcomes matter most to the client. Ask questions like: “What would make you feel this partnership was worth it in 6 months?” This step ensures you’re aligned early and reduces the risk of future disappointment or scope creep.”
By taking the time to have this conversation early, you ensure that everyone is aligned on the big picture. This reduces the risk of missed expectations or scope creep down the line.
Once you’ve aligned on what success looks like, it’s just as important to define what failure means for the engagement. Having clear failure criteria gives your team an early warning system rather than waiting until results are too far off track to recover.
This means agreeing on specific signals that indicate it’s time to pause, evaluate or adjust strategy.
Lars Nyman, CMO of Nyman Media, shared this suggestion:
“Pre-define what failure looks like. For instance, if SQLs drop below Y for Z days, trigger an escalation or strategic rethink. This prevents passive decline and reactive firefighting.”
Once you’re done with the kickoff call, turn everything you agreed on into a short service or expectations agreement. It’s a simple way to prevent confusion later and give your team a clear, shared starting point.
In some cases, the client’s legal team will need you to sign a formal agreement before you can move ahead. That’s usually their responsibility to initiate, but if there’s a delay, don’t hesitate to give them a gentle nudge to keep things moving.
Dhanvin Sriram of Luppa AI, says this step can be a powerful tool to reinforce alignment and avoid headaches down the line:
“One of the best ways to prevent scope creep and build mutual accountability is to wrap up onboarding with a short, plain-English “Expectations Agreement”. This isn’t legalese, it’s a 1-page summary of who’s responsible for what, how feedback cycles work, turnaround times and what defines success. We always had the client and the account lead sign it. It sets a collaborative tone and becomes a handy doc to reference later if things start to drift. Clients appreciate the clarity and it shows you take structure seriously, without sounding corporate or cold.”
After the onboarding is completed, you need to build in regular check-ins. These touchpoints are essential for maintaining and identifying roadblocks early.
Don’t wait for issues to surface. Instead, schedule reviews to assess progress, gather feedback and make any needed adjustments to the plan. Even a quick 15-minute sync can uncover insights that keep the partnership moving forward.
Victor Karpenko, CEO and founder of SeoProfy, shared his thoughts on this:
“Lots of agencies win the contract, then disappear for weeks while they “prepare things” in the background. This silence almost always makes clients nervous - our data shows that if there’s even a ten-day gap with no contact, about 60 percent of new clients start emailing anxiously to check what’s going on. For complicated launches, that anxiety and loss of trust ramp up quickly. That’s why our onboarding checklist now ensures the client gets an update for every milestone, no matter how minor.
Sometimes that’s as simple as a Slack message along the lines of: “We just completed your technical audit, expect a deep dive from us by Friday.” After adopting these “micro updates,” our clients rated their onboarding experience 18 percent higher in post-launch satisfaction surveys.” says Victor
But while regular check-ins are important, you also need to respect your client’s time. Overloading the calendar with meetings can lead to fatigue and slow momentum. Instead of checking in multiple times a week, consider lighter-touch methods like email updates or shared progress docs to keep everyone in the loop.
For example, sending a concise weekly report outlining wins, blockers and what’s next can be effective. Then, you could have deeper check-ins, typically once or twice a month, or whatever was agreed on during the kickoff call.
Once you’ve mapped out your onboarding checklist, the next step is to put it into a usable format. Ideally, you’ll want two versions: one internal-facing checklist for your team and another client-facing version that outlines what they can expect.
If you’re looking for a polished starting point, Visme offers a variety of professionally designed templates that can be easily customized for different onboarding needs.
Simply sign up or log in to Visme and start a new project.
Navigate to the client checklist category and choose a template that fits your topic and audience, then open it in the Visme editor.
You can add, remove, duplicate and move pages; change background colors, text, images, font, colors and much more.
Creating your own onboarding checklist is great, but without a proper delivery, it might fall flat.
Here are some expert tips to help you deliver your onboarding checklist with impact.
Even if two clients seem alike on paper, what they need from you can be totally different. Their goals, decision-making styles and definitions of success may vary widely.
If their first experience with you feels generic or disconnected, it signals that you weren’t really listening and that’s a tough first impression to overcome.
Onboarding should pick up right where the sales conversation left off. Use what you’ve already learned about their goals and challenges to add a touch of personalization that actually feels relevant. It doesn’t have to be fancy, just thoughtful. That extra bit of intention goes a long way in building trust from the start.
So, how do you actually make onboarding feel personalized and relevant? Start by digging into the data you’ve already collected such as industry, role, goals and past conversations.
Use that context to shape your follow-up. For example, instead of a generic welcome email, send one that speaks directly to what your client is trying to achieve.
For a marketing agency, you could send a personalized Loom walking through campaign ideas based on their website or recent social posts.
You could even walk them through a strategy you’ve used for a client that had a similar need, like a landing page tweak that boosted conversions or a high-performing retargeting setup. It shows that you’ve done your homework and are already thinking ahead.
One of the biggest mistakes agencies and consultants make in the early days of client onboarding is overwhelming new clients with too much, too soon. While it might feel efficient to lay out everything at once, it often backfires, causing confusion or even mistrust. The goal should be to make progress, not friction.
Asawar Ali, Automotive Expert and Marketing Manager at Cadillac Accessory shares some insights from his experience:
“When I initially began working with client relationships, I fell into the trap of providing too much information at one time to new clients. One auto parts distributor was presented with a 47-point checklist on the first day and complained immediately about the complexity problems for the project. I realized clients require progressive disclosure, providing enough information to build confidence without paralyzing them. Now, I segment my onboarding into bite-sized pieces: 5 items for week one, 8 for week two and 12 for the remainder of the week. This strategy has given me a 92% checklist completion rate versus the 34% industry average.”
To get meaningful engagement from clients, go beyond just sharing information with them.
The best onboarding experiences don’t just inform; they invite clients to do something right away. Prompting your clients with small steps right away can lead to deeper engagement and long-term success.
For instance, you could ask the client to upload essential files like their brand guidelines, audience personas, or past campaign reports via a shared drive or client portal. It’s a simple, low-effort task, but it immediately engages the client as a collaborator.
Asawar puts this into practice with every new client:
“Each item on the checklist should trigger action on the client's part within 24-48 hours. Passive reading of information doesn't create momentum. Active doing does. My clients who get 80% of micro-commitments in week one are 5x more likely to be long-term partners.”
A lot of onboarding checklists end up being glorified task lists that get checked off without really moving the needle. But if you want your clients to stay engaged and aligned, your checklist should do more than track completion. You need to find out if the client understands the process.
When each item has a clear, measurable outcome, you’re less likely to run into confusion or rework down the line.
“Each activity on your list should have measurable outcomes. For example, ‘Client understands project scope’ turns into ‘Client can define three major project deliverables in their own words.’ This specificity improves accountability and reduces miscommunication by 67%.” says, Asawar.
Clients are far more likely to stay engaged and committed when they feel a sense of excitement about what’s ahead. That early emotional spark can be the difference between a transactional project and a long-term partnership.
One simple way to do this? Build excitement directly into your onboarding checklist.
For instance, you could give the client early access to a curated internal resource hub such as templates, email swipe files, case studies, or past performance from their industry.
You could frame it as: “Since you’re now a partner, here’s exclusive material we usually reserve for long-term clients.”
These early wins give your client something tangible to get excited about and makes them feel confident they made the right decision.
Once your client has the checklist, your job shifts to guiding them through it, making sure tasks are completed, questions are answered and no one’s left in the dark. Here are some tips that’ll help:
Once onboarding kicks off, don’t let things slip through the cracks. Use a CRM, project management board, or dashboard to keep a clear view of where each client stands in the process. This makes it easy to:
Build in simple but intentional feedback moments at key checkpoints, like right after your kickoff call or midway through the onboarding process.
Ask questions like:
These quick pulse checks not only surface hidden concerns early but also send a clear message: We care about your experience, not just the deliverables. Clients are more likely to open up when you create space for honest feedback and respond with thoughtful action.
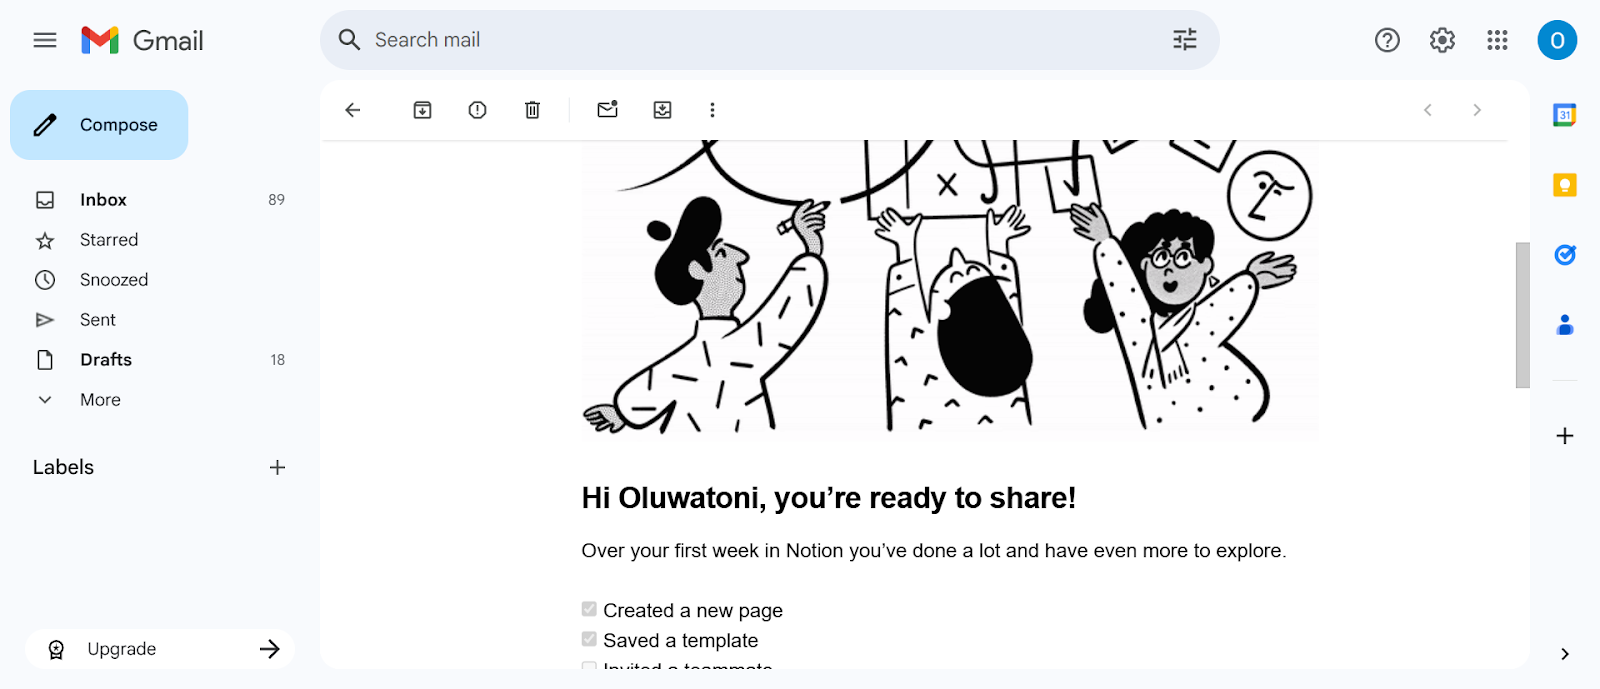
Don’t wait until the end of a project to celebrate progress. Small wins like completing onboarding, approving the first content draft, or launching a campaign are key markers that are worth celebrating.
You could celebrate milestones by sending a quick personalized note, recording a short Loom video to say “great job,” or even mailing a thoughtful (but low-effort) gift like a branded notebook or treat.
See how Notion celebrates my first week of using their tool.
Now that you have a clear picture of how to create and deliver your onboarding checklist, you’re probably ready to put it all into action.
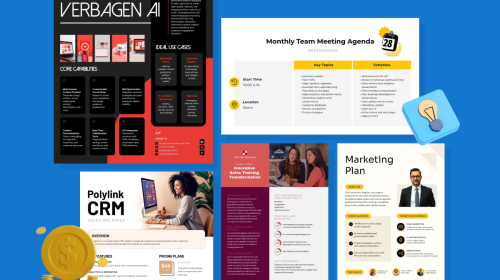
To speed things up, Visme has a wide range of fully customizable templates you can use as a starting point for your design. You can use these templates as is or customize, edit and add sections so that it’s suited to your specific product, service or project.
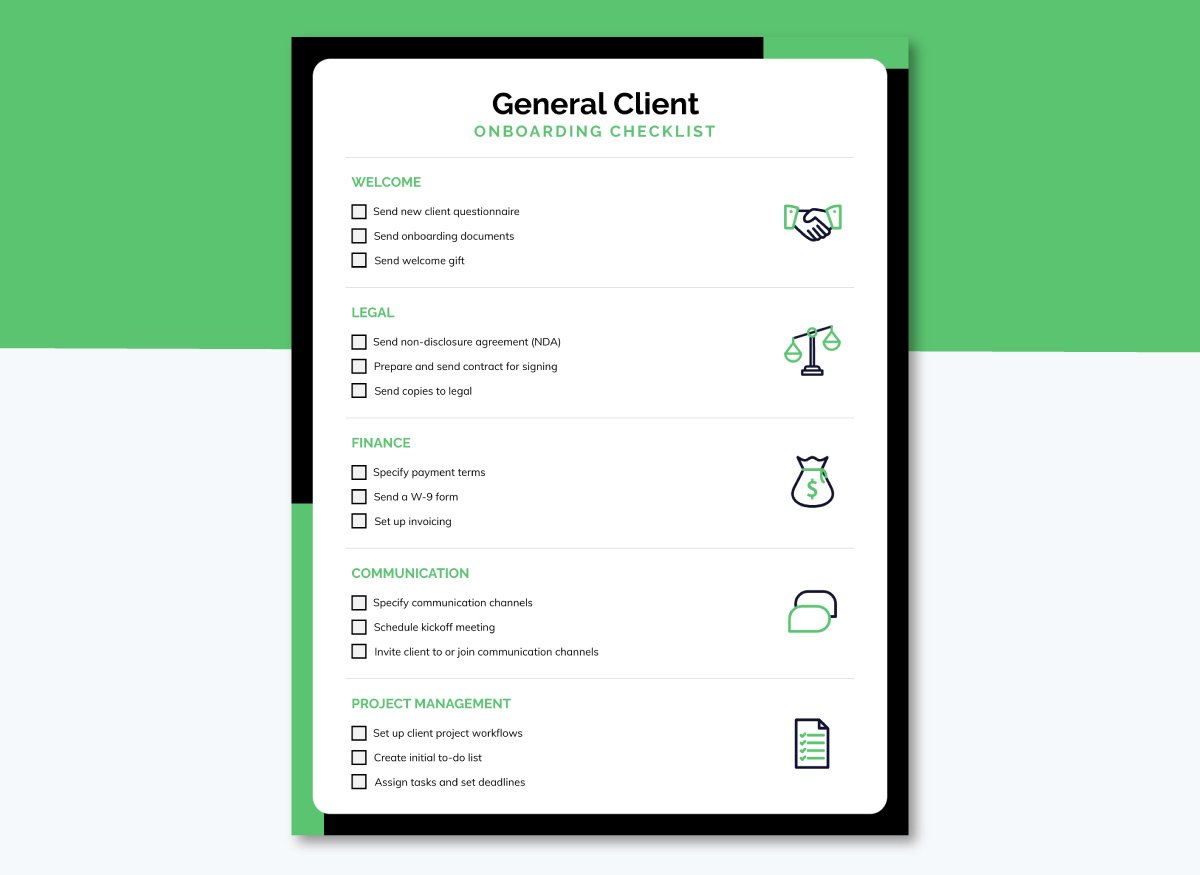
Avoid missed steps and build strong client relationships from the start with this professionally designed template.
This checklist lets you organize your onboarding process on a single page while covering critical tasks from legal to communication workflows.
You can use large checkboxes to mark progress clearly and make each section stand out with bold icons that add visual interest. For deeper context and to avoid clutter, consider linking to supporting documents, such as onboarding questionnaires or GDPR statements.

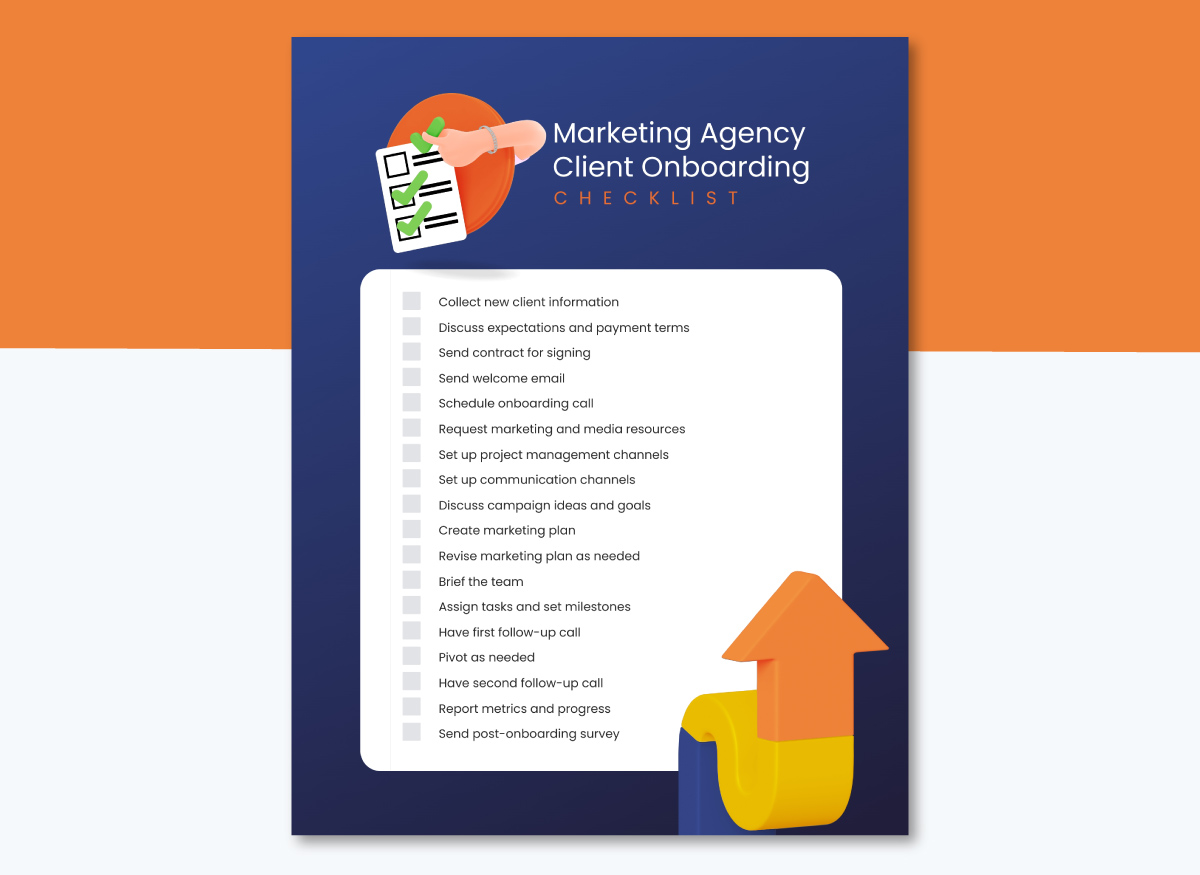
Here’s another business-focused client onboarding checklist template you can easily customize for your sales process.
Rather than a lengthy list, it breaks down the onboarding journey using four categories: Onboarding Materials, Welcome Email Series, In-App Tutorials and Follow-Up Call. Each section includes a list of actionable items that guide your team.
One unique design choice is the use of bold, circular icons above each checklist section. This visual “anchor” organizes the information into themed clusters, making it easier to scan and understand.
Need some extra help or someone to review your checklist? You can use Visme to collaborate with your team, eliminating the need for back-and-forth emails and bottlenecks.
You can invite people into your workspace and give them permission to tag each other, view, comment and edit the content in real time or asynchronously.
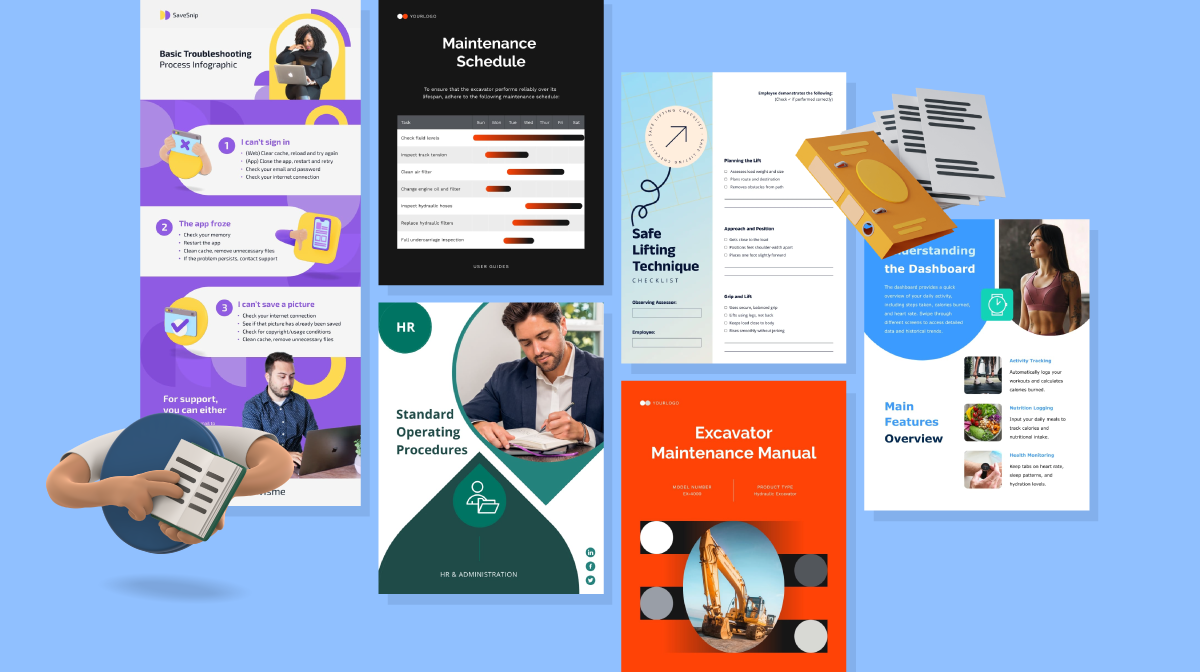
If you’re presenting to agency stakeholders or client teams, this marketing agency client onboarding checklist template offers a no-frills design that gets the job done. It uses a clean vertical list format to walk through each onboarding step in logical order.
Each item is spaced for clarity, allowing teams to easily track what has been done and what remains to be done.
The checklist-style visuals, paired with a subtle illustration, add just enough structure without distracting from the task flow.
With the workflow feature, you can assign specific tasks in your onboarding checklist to the right team members, set clear deadlines and track progress in real-time.
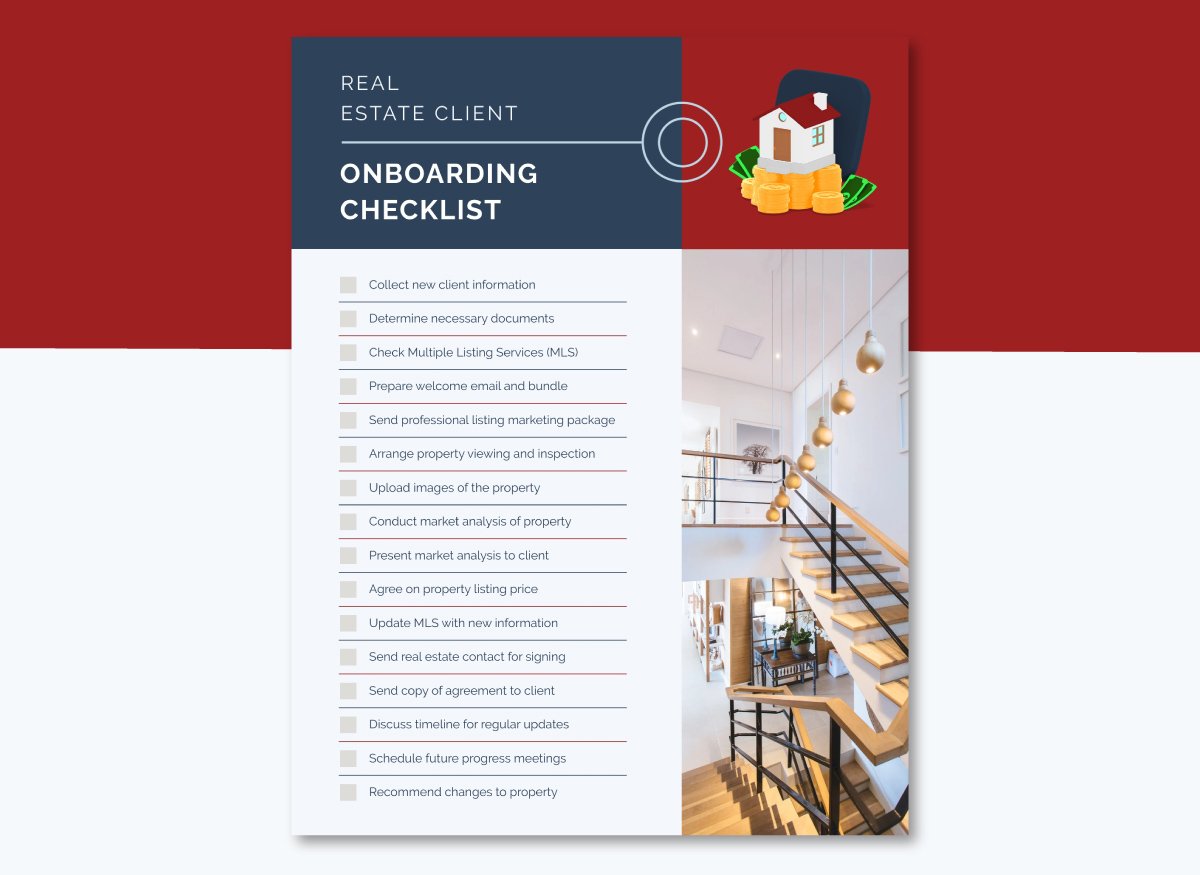
Give your real estate clients the best onboarding experience from the start with this onboarding checklist.
The checklist is segmented with horizontal lines that separate each onboarding task. This makes the content easy to scan without overwhelming the user.
Each task is left-aligned with a checkbox, which adds visual clarity and a sense of progression.
The split layout features a high-resolution lifestyle image that catches the eye. You can easily replace the default image with your own property photos and refine them using Visme’s AI Edit Tools. This wizard is perfect for upscaling, unblurring, or removing distracting objects.
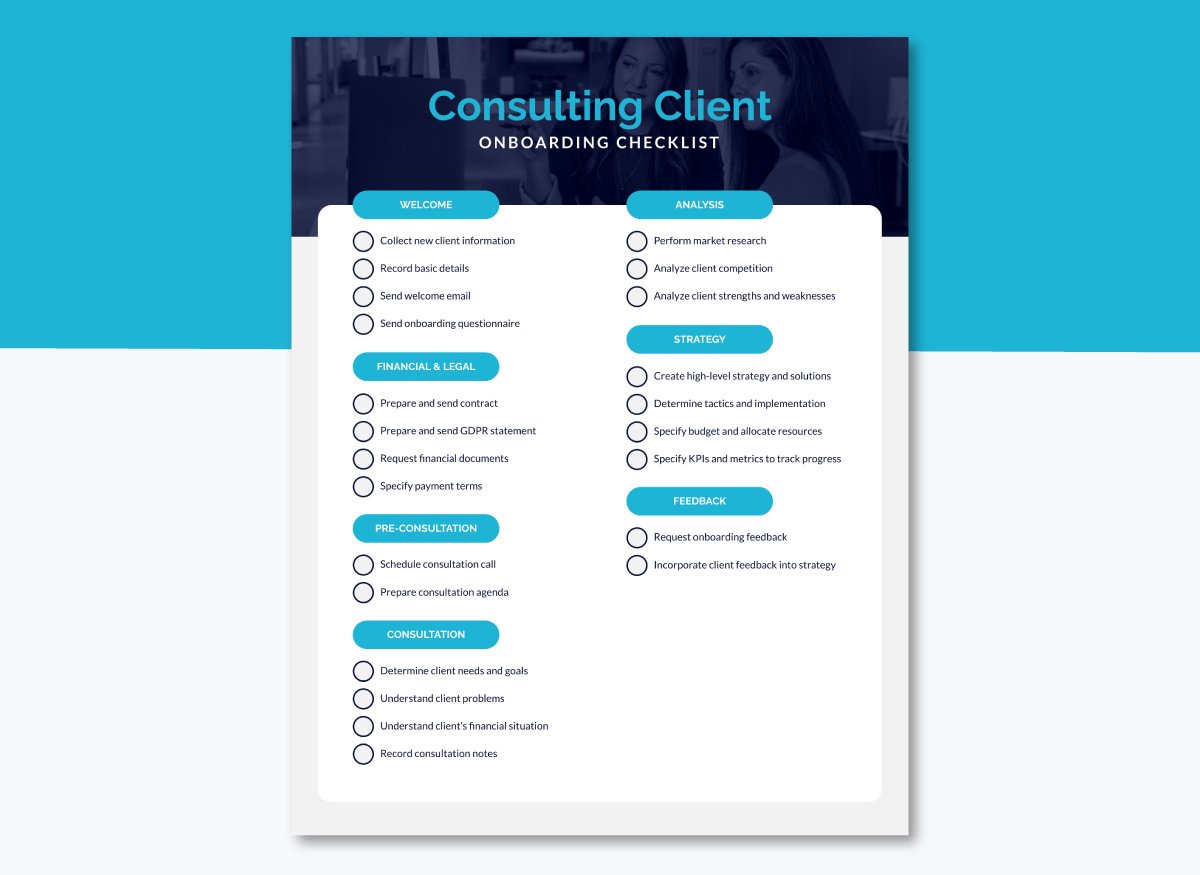
This template is great for presenting a comprehensive consulting client onboarding process without overwhelming your audience.
Rather than crowding all the steps into one block, the checklist is intelligently grouped into seven clear stages—Welcome, Financial & Legal, Pre-Consultation, Consultation, Analysis, Strategy and Feedback. Each category is organized into digestible chunks and action points, making it easy to follow the client journey from start to finish.
The bold section headers and consistent use of color-coded labels offer instant visual cues, while the linear layout makes scanning effortless.
You can keep these categories as they are or create your own. Once you’re done, you can share and download your checklist as a PDF, share the live link, or export it as an image file. You can also export it in SCORM or xAPI formats for your learning management system (LMS) or learning record store(LRS).
Here are some perks of using a client onboarding checklist.
The design of your customer onboarding process will depend on the type of product or service you’re offering and the specific needs of the customer.
Here’s a common approach that most teams follow to create an effective onboarding process:
Your client onboarding checklist should include enough detail that is clear enough to guide the client during the onboarding journey. If there are complex steps, use expandable notes, tooltips, or links to a SOP, Loom video, or help doc instead of stuffing the checklist with long explanations.
You can also test your checklist with a few clients and refine it based on where they asked questions or got stuck. That’s your best cue for where to add or trim detail.
Taking the time to build a thoughtful onboarding experience pays off in multiple ways. Clients feel supported from day one, expectations are aligned early and your team can work more efficiently with fewer hiccups.
The best part? You don’t need to start from scratch or spend hours formatting documents. Visme offers a range of ready-to-use onboarding templates designed for consultants, agencies and service-based businesses. Access interactivity options, branding, visual assets, analytics, real-time collaboration and workflow tools, AI tools and more.
Plus, you can export your checklist in SCORM and xAPI-ready formats and upload it to your LMS.
Sign up for an account today and start creating checklists that elevate your client onboarding experience.
Design visual brand experiences for your business whether you are a seasoned designer or a total novice.
Try Visme for free